1. Create Project
1.1 Project Name
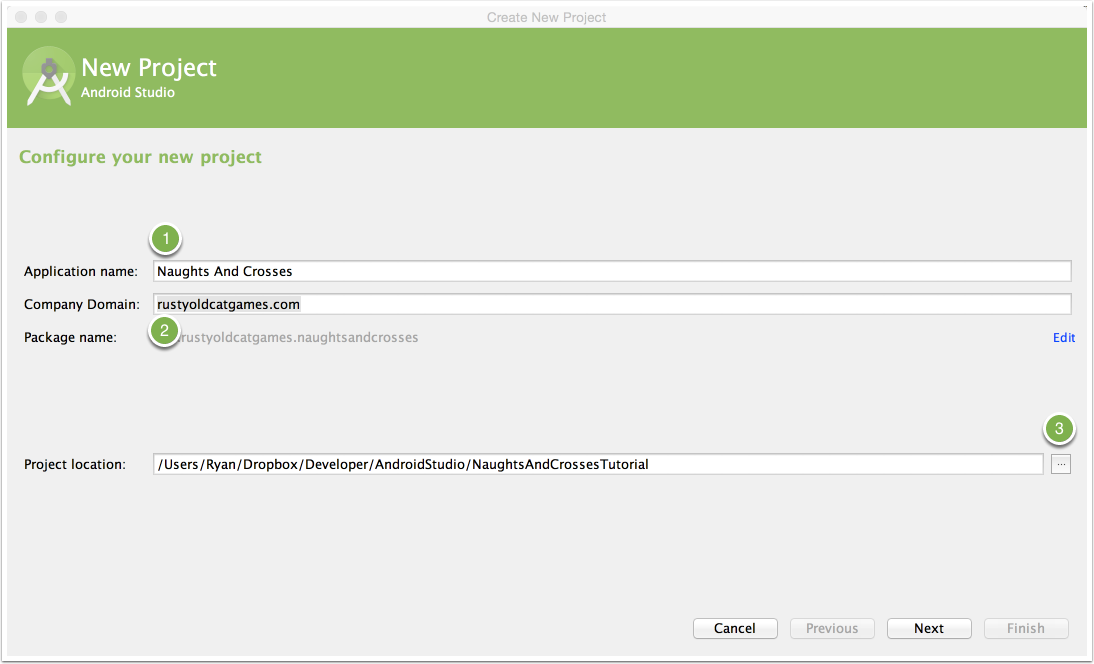
In Android Studio, go to File and choose New Project.
The New Project Wizard will appear. Enter the name of the project and the Company Domain.
Click the browse button to save the project in the desired location.
Click Next
1.2 Android Versions
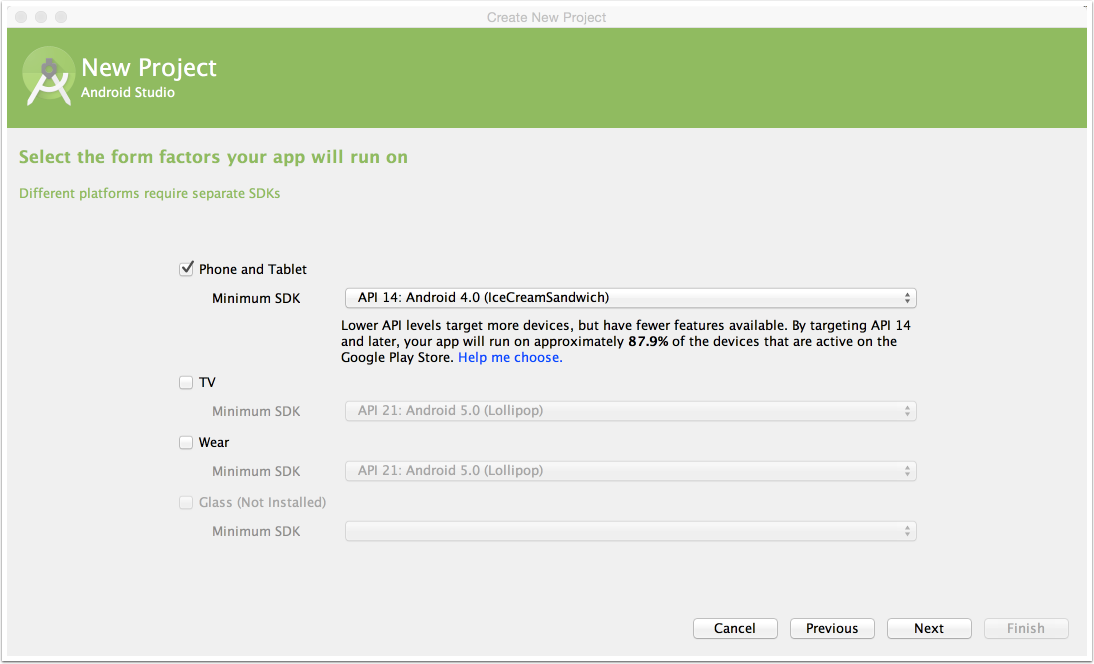
In this step of the wizard, you need to select the platform and version of Android you are targeting the app for.
For this tutorial, set the minimum SDK to be API14 which is version 4.0 of Android, or better known as Ice Cream Sandwich.
Click Next.
1.3 Create Activity
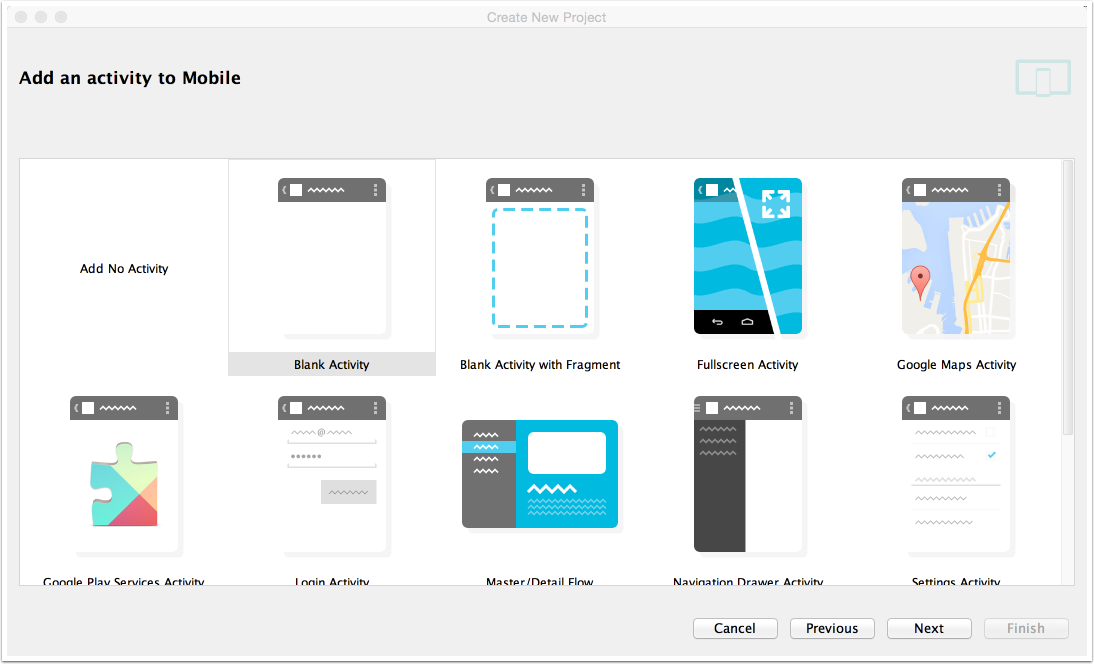
In this step, you have options for a number of predefined activities for different uses. In this tutorial, you'll just start with a blank activity. Select that and click Next.
1.4 Name the activity
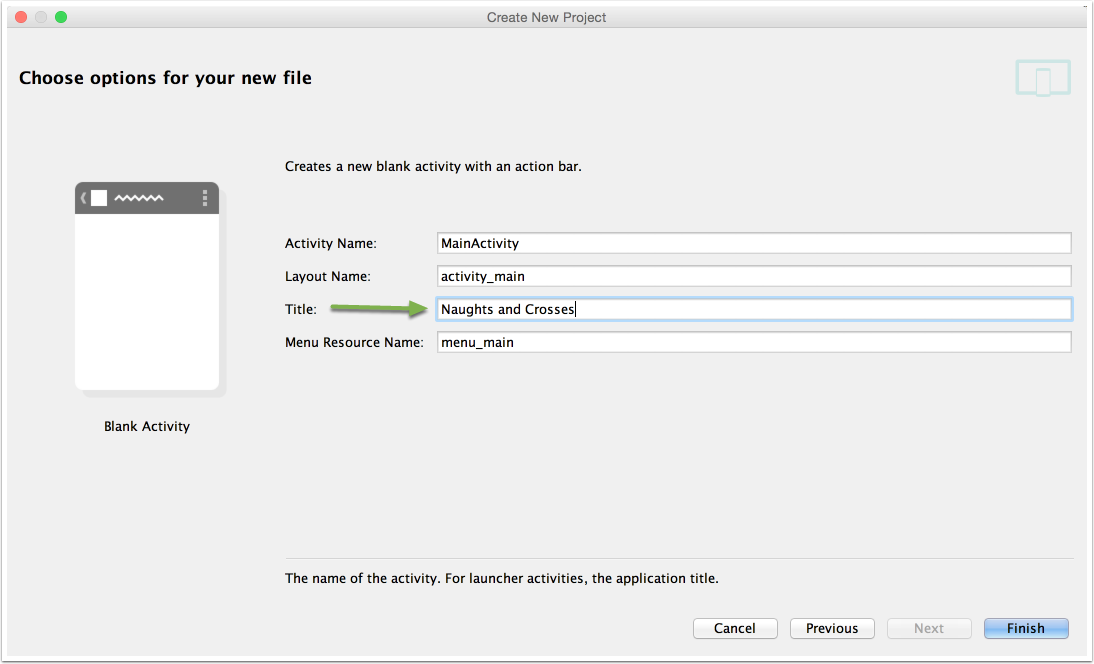
In this step you can set the name of the Java and User Interface file, but you don't need to do that in this case.
The only setting you will need to change is the Title. Change that to "Naughts and Crosses" and click Finish.
Your project will then be created and loaded with the required components to run an Android App.
1.5 Make a test run
After the project has been created, you'll notice that it displays the Design view of your User Interface.
You can run this app in the emulator or on a device by clicking the green play button in the tool bar. Android Studio will then prompt you for which device or emulator you wish to run your app on. Choose an appropriate option and click Ok.

1.6 The app is running!
Your app should load on the device or emulator you chose!
Hello World, indeed.
